Running a Geo Fenced Campaign
Navigate to Audiences, add a new targeting rule, select a group, and in the category dropdown, choose Geo.
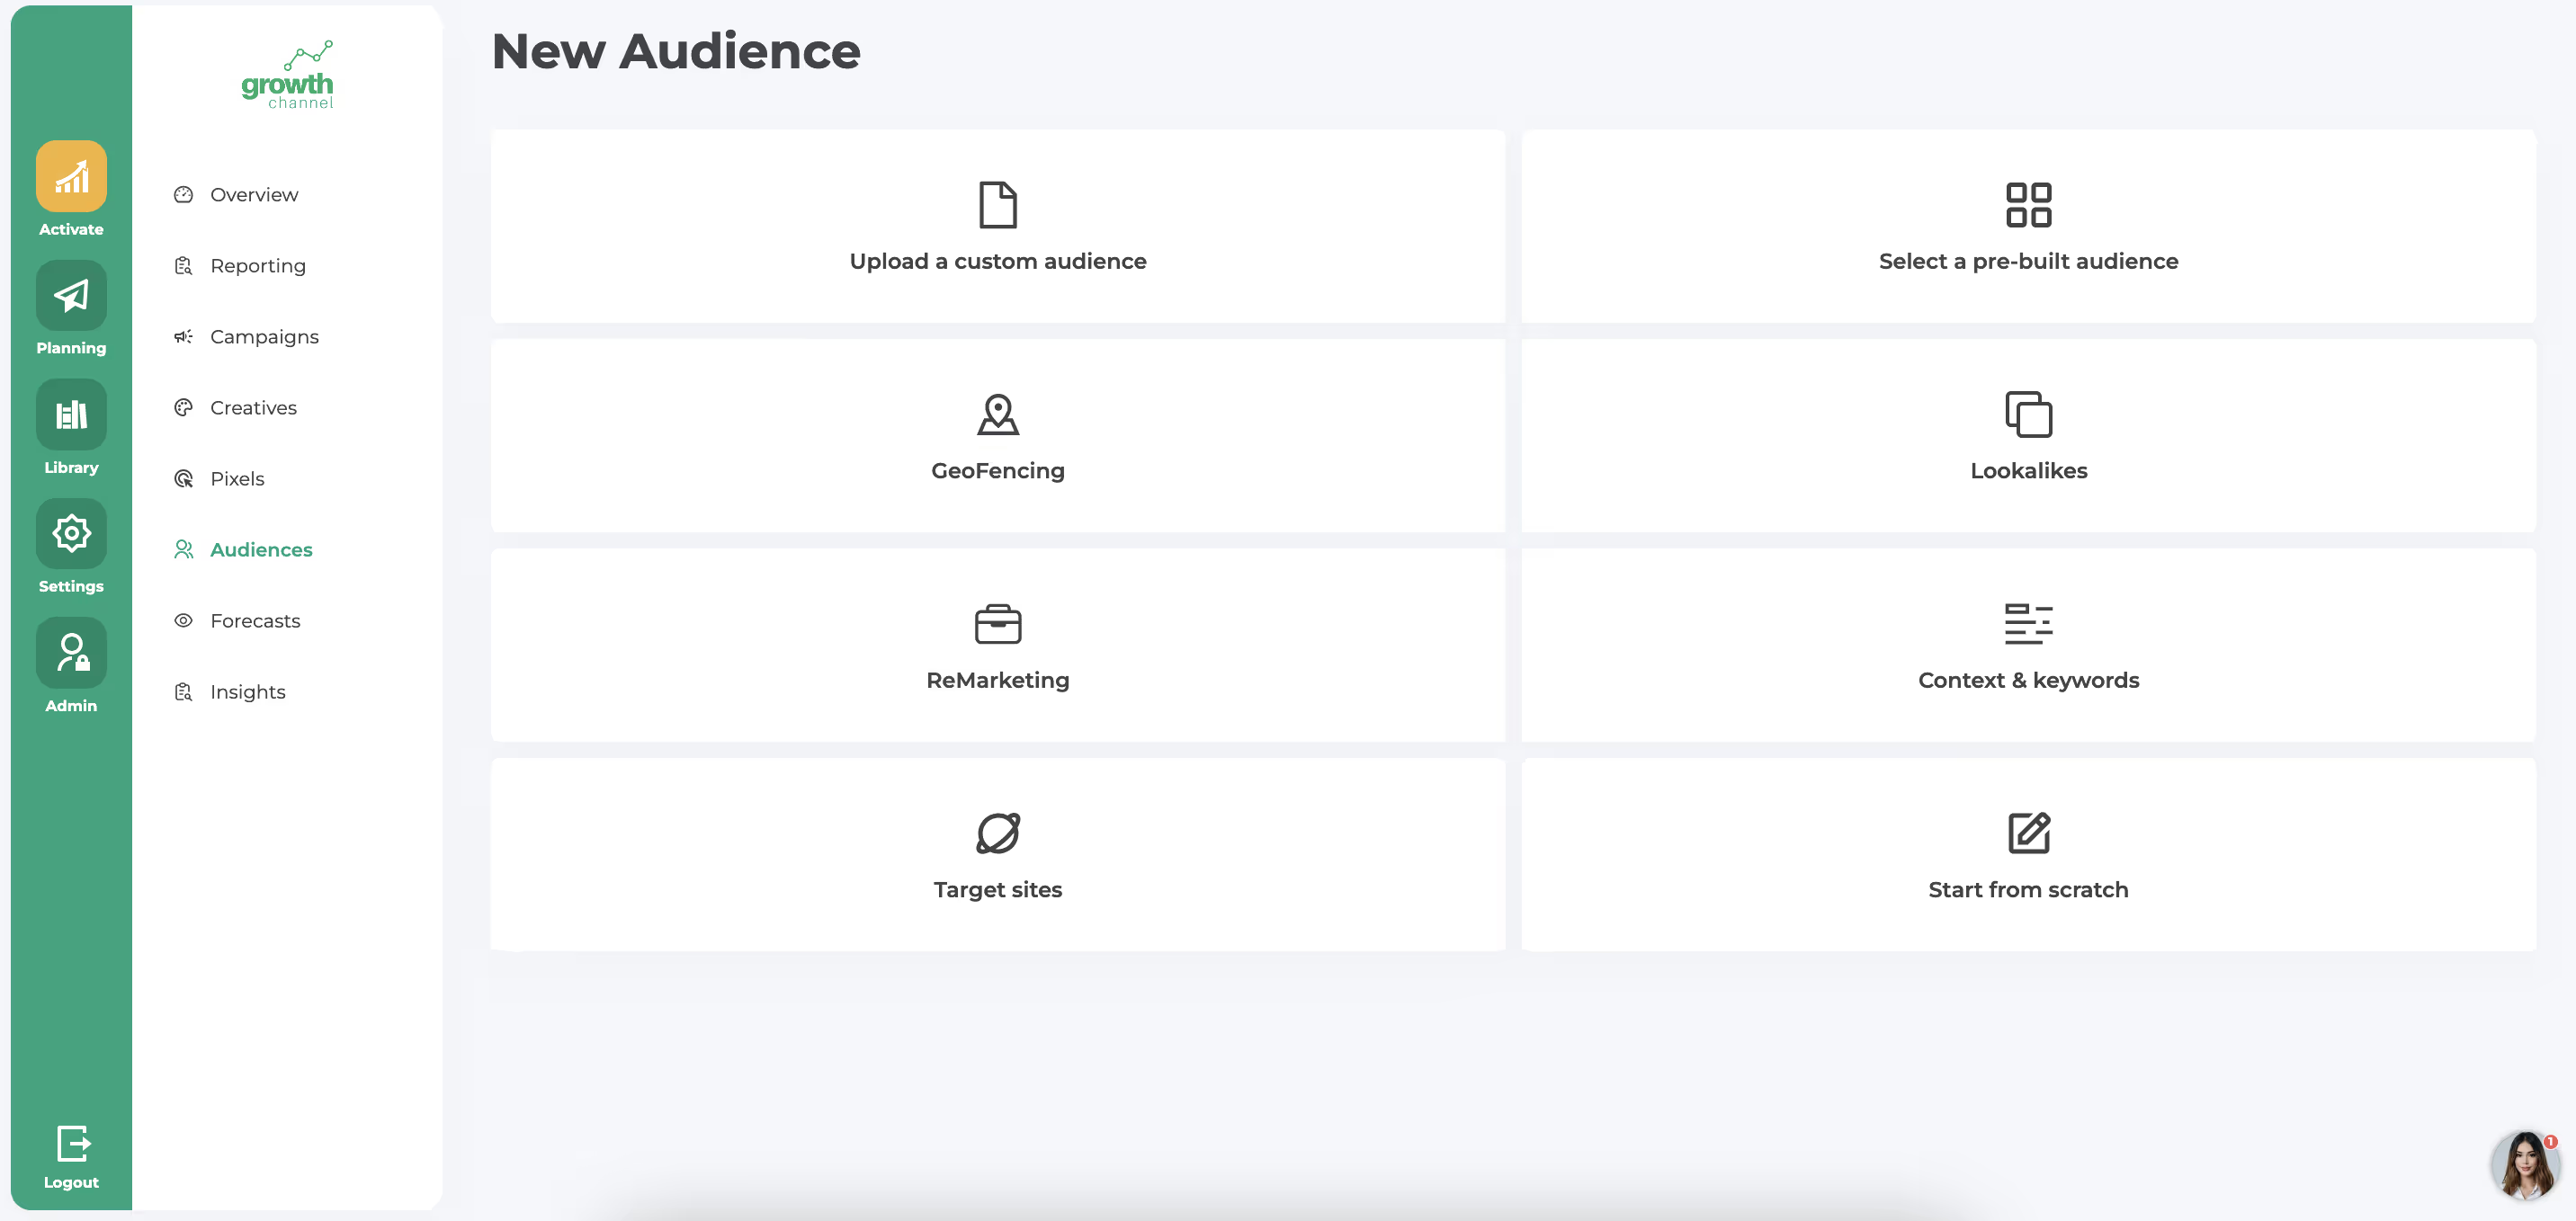
Navigate to Growth Channel Audiences under the Activate menu, and click to add a new audience. A screen with preset templates will open. Select "Geofencing".
Growth Channel will pre-populate Address for geofencing audience. You will need to enter address as it is listed in Google Maps and add a radius in either km or miles (decimals supported i.e. 0.01)
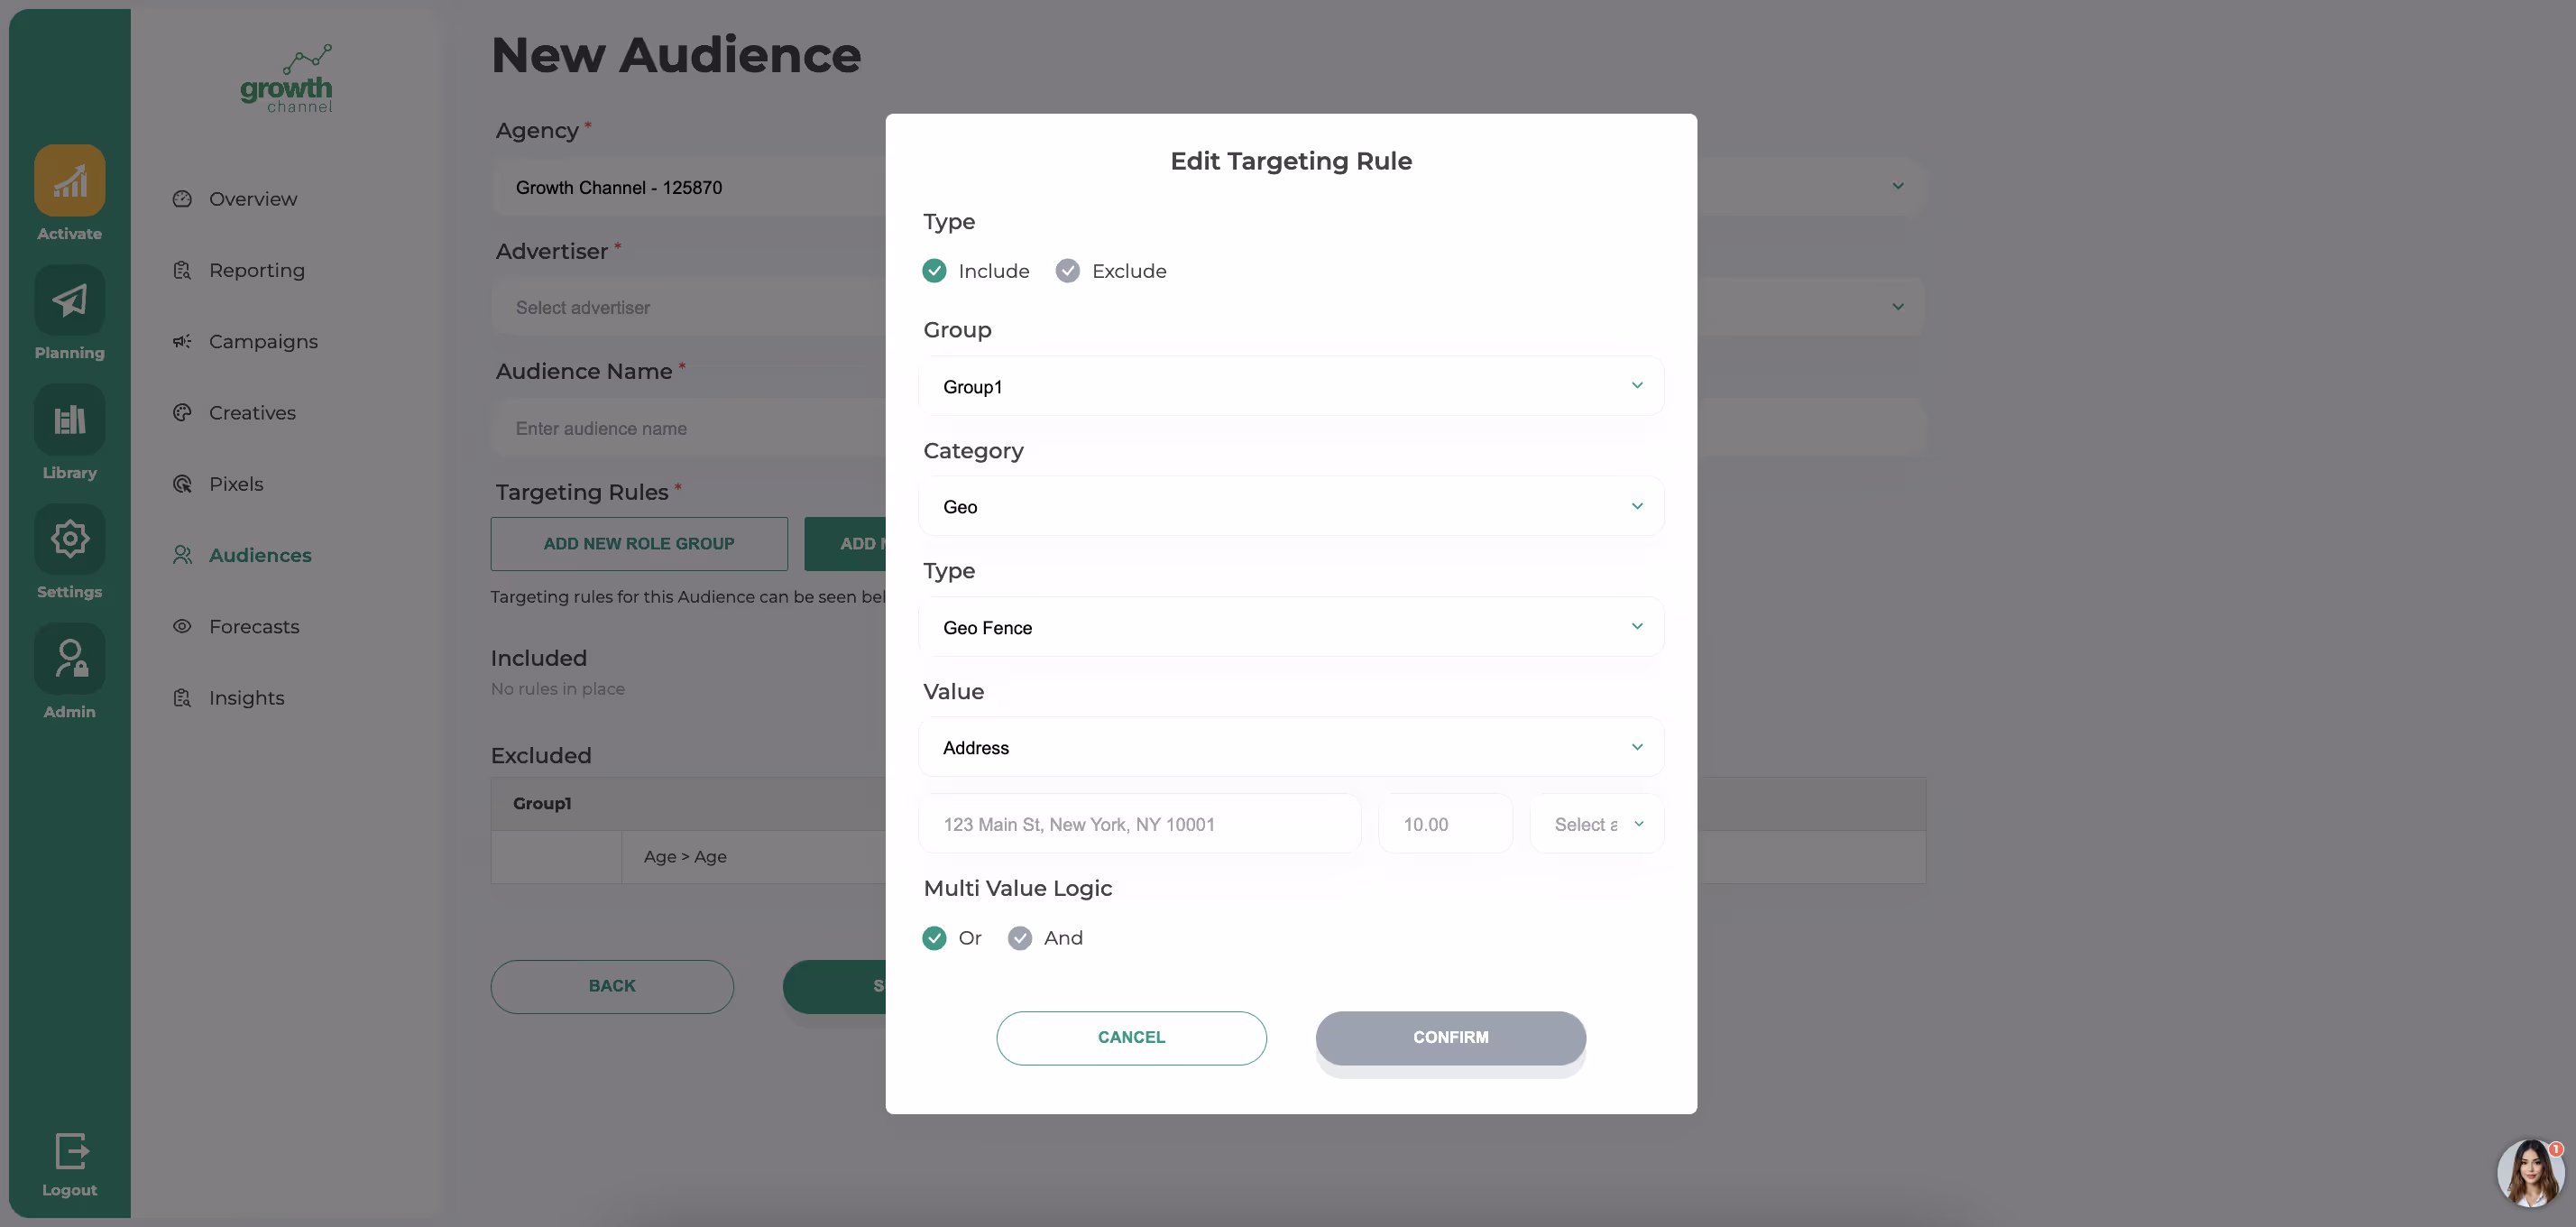
In the Value dropdown, you can also switch to Keyword or Lat/Lon.
If you are adding geofencing strategy as another targeting layer to another audience:
Click to add a new targeting rule, select a group, and in the category dropdown, choose Geo and under Type - Geo Fence.
Once your audience is ready, click Submit.
You will select the audience in step 1 of the campaign creation for targeting.
Get personalized guidance from our team to set up your campaigns for success.
Our support team is here to help. Reach out anytime for personalized assistance.